The Perfect Cup
One of the many frequently asked questions by the patrons of both the Midlands and Franschhoek coffee roastery is “How do I brew the perfect cup of coffee?”
Like most things in life, this is no simple question to answer, and a myriad of factors have to be considered, ranging from the preferred method of brewing coffee, pre-ground vs. bean, water temperature and even water condition have to be taken into account.
We’ll start first with the ever-important, and much contested question using of pre-ground coffee or grinding the whole bean before use. The answer of course is quite plain and simple, nothing beats the fresh aroma and flavour of freshly ground coffee, ideally ground within about four minutes of brewing so as to ensure that none of the important flavour characteristics are not lost.
Whether you use pre-ground or whole beans, one needs to ensure that they seal the bag properly once opened to ensure lasting freshness. The easiest way to store coffee would be to seal the bag with a clothes peg and place it into a Tupperware container, keeping it in a cool, dry place, as light and moisture will affect the flavour and texture of the coffee.
Next, we’ll look at brewing methods; there are a great many ways that one can achieve a delicious cup of coffee, ranging from simple pour-over contraptions, plungers/French press, filter/percolator machines and then extending further in complexity with domestic and industrial espresso machines. What follows is a simple step-by-step guide to brewing the perfect cup using some of the most common products available on the market.
Plunger/French Press
PLUNGER
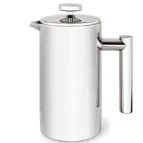
One of the most common, and well-loved methods of extracting a deliciously satisfying cup is by using a plunger or French press pot. It also happens to be one of the oldest, with the first plunger being invented in France in 1658 and attained huge popularity during the reign of King Louis XV. This machine works by soaking dry ground coffee in water before driving down a finely perforated sieve to strain the solid grounds from the brewed coffee. The perfect grind for the plunger is medium or neatly labelled on our bags as plunger grind. This grind is coarser than what one would use in a filter or percolator machine to ensure the ground coffee does not pass through the perforations of the plunger resulting in undesired sediment in your cup. As always, ensure that your plunger is cleaned thoroughly after every use.
Step One
To start, pre-heat the plunger with hot water, while boiling water in a kettle or urn for brewing. Pre-heating the pot is important, especially if it’s made of glass, which could crack if it’s exposed to a sudden dosage of high-temperature water.
Step Two
Next, dry out the pot, and measure out your desired amount of coffee, with the ideal amount being between 8-10 grams per cup – Don’t be stingy. The ideal water temperature for coffee extraction is around 94 degrees Celsius, so once the kettle has boiled, wait between 20 to 25 seconds for the temperature of the water to reduce before filling the pot to the desired level. Stir the mixture thoroughly with a spoon to incorporate all of the ground coffee.
Step Three
Place the lid on the plunger and drop the sieve until it sits just above the coffee. Allow the coffee to brew for about four minutes before slowly pressing down on the plunger. Serve as soon as possible, and enjoy.
Moka Pot/ Manual Espresso Machine
MOKA
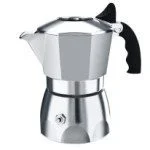
Next comes a fantastic device invented once again by the French, used to manually brew espresso, commonly known as the Moka Pot. This ingenious little machine has three separate compartments, with the bottom compartment being used for water, a small middle compartment for ground coffee, and a top compartment in which one will find their brewed espresso. The Moka pot works by placing the device on a heated stove top, the water from the bottom compartment will boil through the coffee held in the middle compartment and then up into the top compartment, from where it can be served. This is a must-have for lovers of espresso.
Step One
Separate the compartments of the pot and fill the bottom chamber with water up to the bottom of the safety valve. Fill the middle chamber or coffee basket and level it off, to ensure an even distribution of ground coffee. The best grind to use for this method of extraction is a medium-fine grind, or filter grind on our bags. Lightly (and very slightly) compress the coffee to eliminate any air pockets, which would cause water to run through the coffee too quickly. Using your fingers, remove any loose coffee from the rim of the basket and place the basket into the top of the lower chamber.
Step Two
Firmly screw the upper and lower chambers together. Remember to hold the pot upright so you don’t wet the coffee grounds too soon! Place the Moka pot on the stove on a low to medium heat. Eventually, the water will boil and the steam created will force the water up and through the ground coffee. Keep an eye on how the coffee is running through the spout into the upper chamber, and listen out for a tell-tale bubbling noise. Once the coffee begins to run through, immediately reduce the temperature to very low, so that the water does not run through too quickly, making the coffee watery and acidic.
Step Three
When most of the water has been extracted from the lower chamber, the aforementioned bubbling noise will become intermittent. Once you hear that, remove the pot from the heat completely. Wait for the bubbling to ease off before serving.
Take Note:
Due to the high pressure created within the Moka pot, it’s extremely important that you clean the pot thoroughly after every use, checking that the rubber seal underneath the upper chamber, and that there is nothing obstructing the expulsion of air from the safety valve on the lower chamber.
Filter/ Percolator Machine
FILTER
Another incredibly popular method for brewing coffee is the filter or percolator machine. This device works by introducing heated water to coffee placed inside a paper filter and allowing it to drip through slowly using gravity rather than force into a jug which is heated from below by a hot plate. The result is a deliciously full bodied cup with much stronger flavour than one would achieve by using a plunger. This is a popular method for brewing coffee on a large scale and requires little effort to brew. The downside to this machine, however, is that once a pot of coffee is made, it should be consumed within 20 minutes, so that the coffee doesn’t become stale, and lose important flavour and textural qualities.
Step One
Start off the process by filling the filter machine’s reservoir with cold, fresh water right to the indicated level on the machine. Place a paper filter into the funnel of the machine, and load it with about 10 tablespoons of coffee per litre of water. Again, always ensure that the machine is clean before use!
Step Two
After a few moments, the coffee should begin to drip through into the jug at a temperature of about 92-98 degrees Celsius. In mid-brew, check the funnel to ensure that all of the grounds are wet. If not, give them a quick stir and replace.
Step Three
When the brew is finished, stir the jug and serve as soon as possible.
Aeropress
AERO
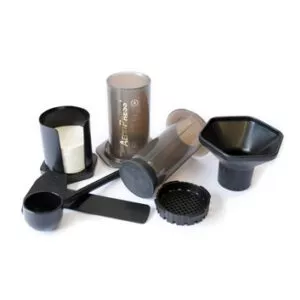
A newly introduced device, the Aeropress manufactured by Aerobie is taking the coffee world by storm due to its simplicity and ease of use, as well as its convenient portability. The Aeropress uses pressurised air to force hot water through ground coffee, creating a deliciously rich cup of coffee, with a quality comparable to that achieved by brewing through an espresso machine.
Step One
Place a paper blind filter into the plastic perforated filter, and attach this firmly to the bottom of the plastic cylinder, place on top of a jug. Load with one level spoon-full of Filter grind coffee per cup. Next, add the appropriate amount of water needed. Stir with the spoon provided. Place the plunger device into the plastic cylinder and plunge immediately.
So there you have it, folks, a definitive, step-by-step guide to a fantastic cup of coffee, no matter which machine you use.
Stay Caffeinated.
TeamTerbo


